
Installing Windows Server Backup
The Windows Server Backup (WSB) is not installed on a Windows 2012 Server by default; It is a feature that must be enabled. This article provides two methods of enabling WSB.
Note: WSB does not support tapes. Make sure that you have a disk, external storage, network share, and free space to back up your server before you start.
Installing WSB using PowerShell
You can install Windows Server Backup by using the following PowerShell cmdlet:
PS C:\> Install-WindowsFeature Windows-Server-Backup
Installing WSB using Server Manager
The following steps are needed to enable WSB using the Server Manager applet
- Launch Server Manager from the taskbar
- In the Server Managaer dashboard, click the Manage menu and choose Add Roles and Features
- Skip through the Add Roles And Features Wizard until you reach the Select Features screen.
- Under the Add Roles and Features Wizard, select the check box for Windows Server Backup
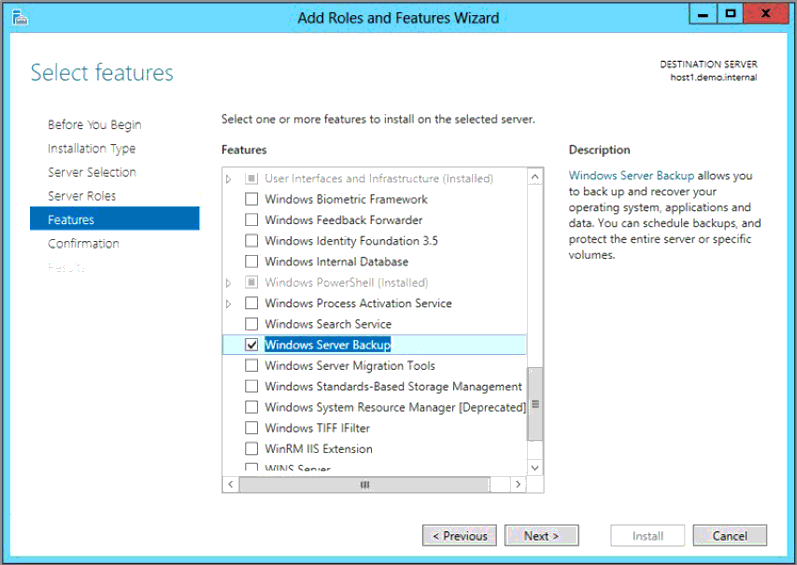
- Click on Next and then click on Install. Wait for the installation to complete
- Complete the wizard
Running the Windows Server Backup tool
To run the Windows Server Backup tool, open the start menu and type wbadmin.msc
Note: WSB can protect only local workloads; it cannot protect remote servers or virtual machines. You will need to enable it in the management OS of every host that has virtual machines that you want to back up. You will need to use an alternative product, such as System Center DPM, if you want centralized protection of virtual machines and data.
Checking the Windows Server Backup commandlets
Some options such as advanced schedule, policies, jobs, and other configurations can only be created through commandlets on PowerShell. To see all the available Windows Server Backup commandlets, type the following command:
PS C:\> Get-Command -Module WindowsServerBackup